
MONO-PITCH FRAMING & CONSTRUCTION
How to Build a Single-Slope Shed Roof: Framing & Layout
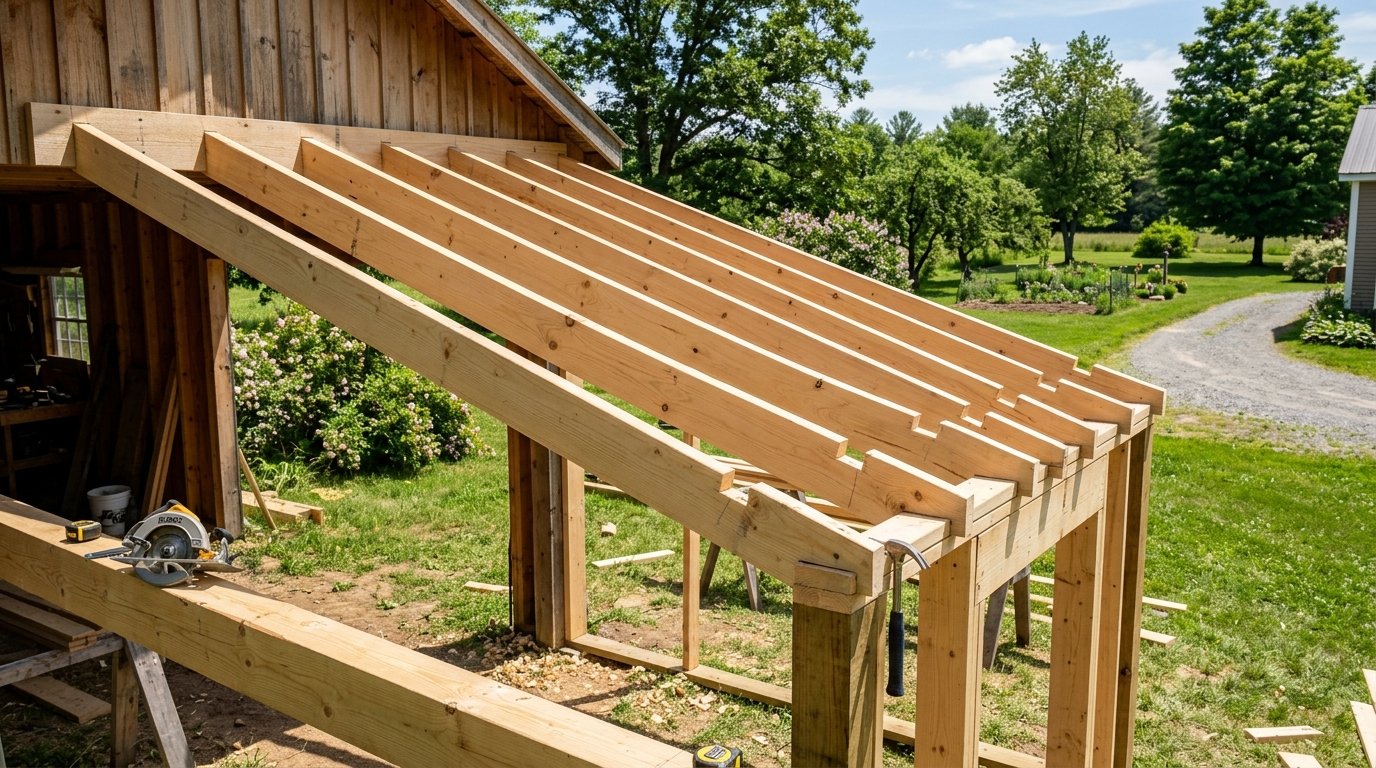
A single-slope shed roof (also called a mono-pitch or lean-to roof) features a single continuous inclined plane spanning between a higher front wall and a lower rear wall. Learn the geometric planning rules, wall height calculations, rafter layout sequence, and roofing material selection for building an efficient shed roof.
Important Structural & Engineering Notice
Structural Span Notice: Rafter dimensions (e.g., $2times 6$ vs. $2times 8$), rafter spacing (16″ vs. 24″ on-center), and lumber grade must be selected using local building code span tables (IRC Table R802.5.1) based on your regional ground snow load and rafter span. This guide outlines geometry, layout, and sequence principles.
Step 1: Determine Dimensions, Pitch & Wall Rise
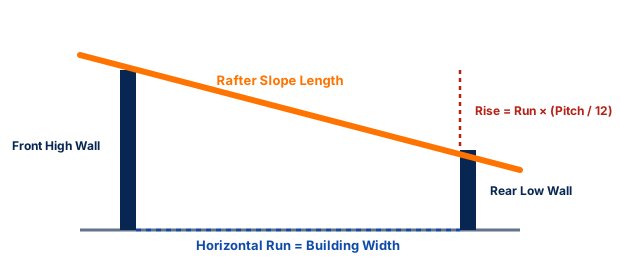
To establish the slope, calculate the required vertical height difference between your high wall and low wall:
$$text{Total Elevation Rise} = frac{text{Horizontal Run (feet)} times text{Pitch Ratio (X)}}{12}$$
Example: For a shed with a 10-foot horizontal run and a 3/12 pitch:
$$text{Rise} = frac{10 times 3}{12} = 2.5text{ feet (30 inches)}$$
Your front framing wall must be framed exactly 30 inches taller than the rear framing wall.
Step 2: Calculate True Rafter Slope Length
Determine rafter lumber length using the Pythagorean theorem plus your eave overhangs:
$$text{Rafter Span Length} = sqrt{text{Run}^2 + text{Rise}^2} + text{Front Overhang} + text{Rear Overhang}$$
For a $10text{ ft}$ run and $2.5text{ ft}$ rise with $1text{ ft}$ overhangs on both sides:
$$text{Slope Length} = sqrt{10^2 + 2.5^2} + 2 = sqrt{106.25} + 2 = 10.31 + 2 = mathbf{12.31text{ ft}}$$
Order 14-foot rafter boards to allow for plumb cuts and overhang trimming.
Step 3: Cut and Install Rafters
- Plumb Cuts: Cut the top and bottom rafter ends at an angle matching your pitch ($14.04^circ$ for 3/12 pitch).
- Seat Notches (Birdsmouth Cuts): Cut level $1.5″$ deep birdsmouth notches where rafters rest on the front and rear double top plates, ensuring full bearing across the wall studs.
- Fastening: Secure rafters to top plates using hurricane ties / seismic framing anchors (such as Simpson H2.5A) at every rafter location.
Step 4: Sheathing, Underlayment & Roofing Material
| Roof Pitch | Required Roofing Material System | Underlayment Standard |
|---|---|---|
| 1/4:12 to 2/12 | Single-Ply Membrane (TPO/EPDM) or Self-Adhered Roll Roofing | Fully adhered membrane substrate |
| 2/12 to 3/12 | Standing Seam Metal or Asphalt Shingles (w/ full ice barrier) | Continuous double underlayment (IRC §R905.2.2) |
| 3/12 & Steeper | Corrugated Metal Panels, R-Panels, or Standard Asphalt Shingles | Single synthetic underlayment or #15 felt |
Related Shed Tools & Guides
Calculate your specific slope geometry with our Shed Roof Calculator, check span tables with our Rafter Calculator, or explore pitch limits in our Shed Roof Pitch Guide.